|
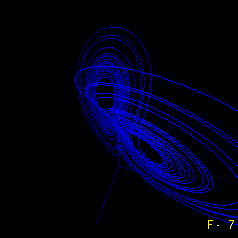
This image shows the trajectory of a particle traced as it follows a solution of the Lorenz system of nonlinear differential equations. The figure looks like two sets of rings each surrounding some invisible point, with one set of rings "leaning" over near us, while the other, standing more upright, is some distance behind. Actually the rings are more like interlaced spirals. When any given spiral around one of the points gets far enough out, it twists in near the other point, only to spiral away from it. Once far enough out from this second point, the trajectory twists in near the first point again, and this "back-n-forth" spiraling continues endlessly. Click here to see an animation as we rotate the attractor about 240 degrees around the z-axis. |

|
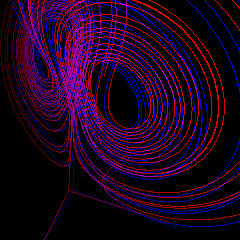
To see the Lorenz attractor in 3-D, you'll need a pair of special 3D glasses.
These glasses have a piece of RED film which will cover the left eye,
and BLUE for the right. (For example, such a pair came with the August, 1998, issue of National Geographic for their article on Mars).
When you look at any object, each of your eyes takes in the scene from a slightly different viewpoint. Your brain puts these slightly different views together into an image which seems to have "depth": you perceive that parts of the object are close to you and parts are far. So we draw the Lorenz attractor twice on the screen from two slightly different viewpoints. One is drawn for your left eye to see, and it's drawn in RED. The blue filter over your right eye will effectively prevent your right eye from seeing the left eye's image. Similarly, the image meant for your right eye is drawn in BLUE, and the red filter over your left eye keeps your left eye from seeing it. If all goes well, you should perceive the Lorenz attractor in 3D: Part of it will appear close to you, actually out in from of the screen --- try to "touch" it (locate its position) with you finger. The middle of the closer spiral should seem to be just in front of the screen's surface, and the rest of the attractor will appear to be behind the screen, especially the upper left corner. If you drag your cursor over the image, it will seem to be in front of some parts of the attractor, and behind others. Click here to see an animation as we rotate this 3D image part way around the z-axis. |
Details.
These images were created with my VisualBasic version of "orbits".
For the animations, several pictures of the attractor were
created. In each frame, the image is rotated around the z-axis
by small additional amount. The individual pictures,
all .bmp files, were collecteinto Microsoft's "PictureIt" software and sewn into an animation, which was stored as a .gif animation file.
| Return to Chip's Home Page
Return to Julia/Lorenz/Cauliflower/PipeOrgan Page |
© 2001 by Chip Ross Associate Professor of Mathematics Bates College Lewiston, ME 04240 |